
The world of robotics is changing very fast, and one of the most exciting innovations today is the 3d printed robot arm. This technology combines robotics, 3D printing, and automation into one powerful system that is affordable, customizable, and easy to build compared to traditional industrial robots.
In the past, robot arms were expensive and only used in factories. Today, thanks to 3D printing, students, engineers, hobbyists, and startups can build their own robotic arms at home or in small labs.
This article explains everything about the 3d printed robot arm in a simple way. You will learn how it works, how to build one, what parts are needed, real-world uses, costs, software, challenges, and future trends. It also includes expert insights that go beyond basic explanations found online.
What Is a 3D Printed Robot Arm
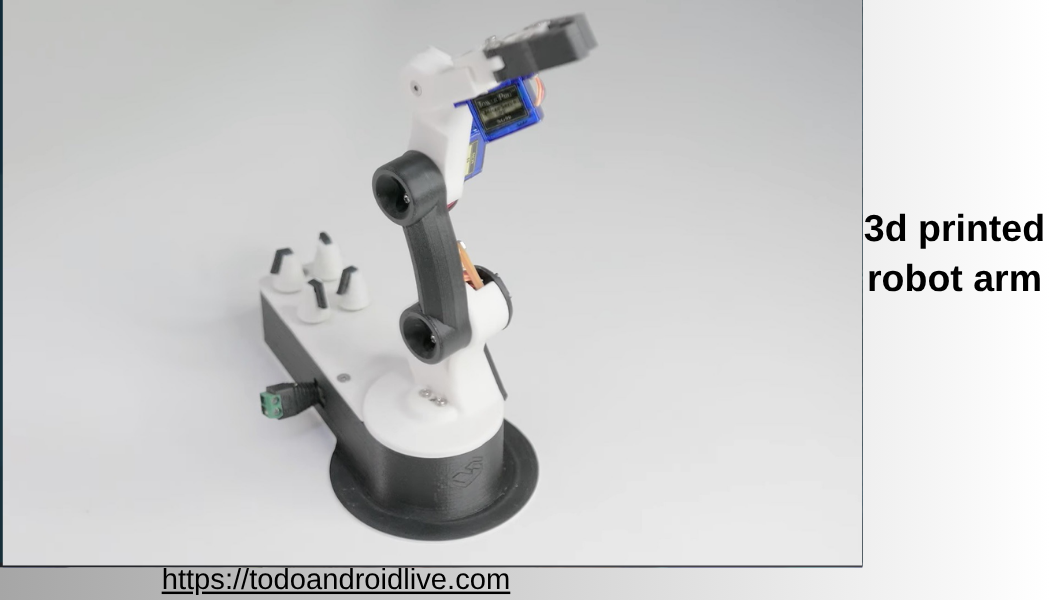
A 3d printed robot arm is a robotic mechanical arm where most structural parts are created using a 3D printer. Instead of being made from heavy metal, it uses plastic materials like PLA or ABS printed layer by layer.
These arms can move like a human arm and perform tasks such as:
- Picking and placing objects
- Writing or drawing
- Assembling small parts
- Automating simple tasks
- Learning robotics programming
The key idea is simple: use a robot arm 3d printer design to create affordable robotics that anyone can build.
Also read:Is Stick Fight the Game Cross Platform? Complete 2026 Guide for All Platforms
Why 3D Printed Robot Arms Are Becoming Popular
There are several reasons why 3d printed robotic arm systems are growing fast in 2026:
Low Cost
Traditional industrial robot arms cost thousands of dollars. A 3D printed version can cost under a few hundred dollars.
Easy Customization
You can modify designs easily using CAD software.
Learning Tool
They are widely used in schools and universities for STEM education.
Rapid Prototyping
Engineers can quickly test robotic designs without expensive manufacturing.
Open Source Community
Many designs are freely available online, making innovation faster.
How a 3D Printed Robot Arm Works
A robot arm works using a combination of mechanical parts, motors, and control systems.
Main Working Principle
- Motors move joints
- Joints control direction and movement
- Software sends commands
- Sensors improve accuracy
The system works similarly to a human arm with:
- Shoulder joint
- Elbow joint
- Wrist movement
Each joint is controlled by a motor, usually a servo motor.
Main Components of a 3D Printed Robot Arm
To understand how to build a 3d print robot arm, you must know its key parts.
1. 3D Printed Structure
This is the frame of the robot arm made using a 3D printer.
Materials used:
- PLA (most common)
- ABS (stronger, heat resistant)
- PETG (flexible and durable)
2. Motors
Motors control movement.
Types include:
- Servo motors (most common)
- Stepper motors (for precision)
3. Controller Board
This is the brain of the robot.
Popular boards:
- Arduino
- Raspberry Pi
4. Power Supply
Provides energy to motors and electronics.
5. Sensors (Optional but Advanced)
- Position sensors
- Force sensors
- Limit switches
6. Gripper or End Effector
This is the “hand” of the robot arm used to grab objects.
Step-by-Step: How to Build a 3D Printed Robot Arm
Building a 3d printed robot arm requires planning and patience.
Step 1: Choose a Design
You can:
- Download open-source designs
- Or design your own using CAD software
Popular designs include:
- 4-axis robot arms
- 6-axis industrial-style arms
Step 2: Print the Parts
Use a 3D printer to print each part.
Important settings:
- Layer height: 0.2 mm
- Infill: 20%–40%
- Strong supports for joints
Step 3: Assemble the Structure
Connect printed parts using:
- Screws
- Bearings
- Metal rods
Step 4: Install Motors
Attach servo motors at each joint.
Step 5: Connect Controller Board
Wire motors to Arduino or Raspberry Pi.
Step 6: Upload Control Code
Programming allows movement control.
Languages used:
- Python
- C++ (Arduino IDE)
Step 7: Test the Robot Arm
Run simple movements like:
- Up and down
- Left and right
- Pick and place
Software Used in 3D Printed Robot Arms
Software plays a major role in controlling robot arm 3d printer systems.
Arduino IDE
Used for basic motor control.
Python Programming
Used for advanced automation and AI integration.
ROS (Robot Operating System)
Used in professional robotics projects.
CAD Software
Used for designing parts:
- Fusion 360
- SolidWorks
- TinkerCAD
Types of 3D Printed Robot Arms
1. Educational Robot Arms
Used in schools and learning labs.
2. Hobby Robot Arms
Built by DIY enthusiasts.
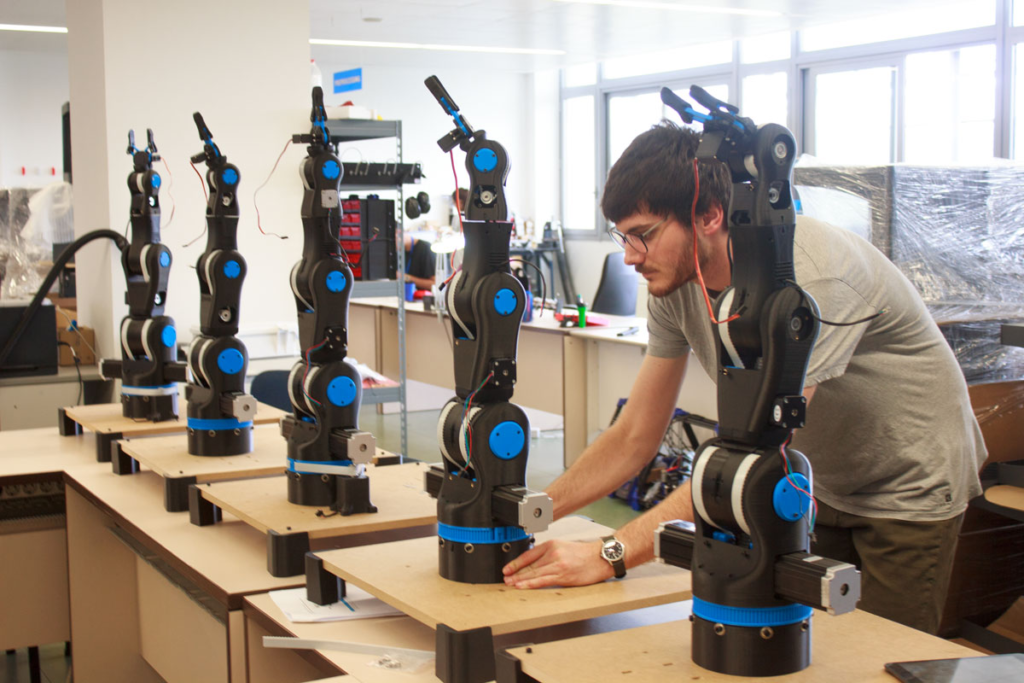
3. Industrial Prototype Arms
Used for testing before manufacturing real robots.
4. AI-Integrated Robot Arms
Advanced systems using machine learning.
Real-World Applications of 3D Printed Robot Arms
The 3d printed robotic arm is not just a hobby tool. It has real uses.
Education
Students learn robotics and programming.
Manufacturing Prototypes
Companies test automation systems.
Research Labs
Used in AI and robotics research.
Small Business Automation
Used for simple packaging or sorting tasks.
Also read:JR Geo: Technology Guide Location Data Mapping And Insights Made Easy
Healthcare Research
Used for testing assistive robotics.
Advantages of 3D Printed Robot Arms
Low Cost
Affordable compared to industrial robots.
Fast Production
Can be built in days instead of months.
Easy Modification
Designs can be changed easily.
Lightweight Structure
Plastic parts make it easy to handle.
Learning Friendly
Perfect for beginners in robotics.
Limitations of 3D Printed Robot Arms
Despite benefits, there are challenges.

Low Strength
Not suitable for heavy industrial tasks.
Limited Precision
Compared to metal robots, accuracy is lower.
Wear and Tear
Plastic parts can wear out over time.
Motor Limitations
Cheap motors reduce performance quality.
Expert Insight: Why 3D Printed Robot Arms Matter
One important insight often missing in basic explanations is this:
3D printed robot arms are not meant to replace industrial robots. Instead, they are innovation tools.
They help:
- Engineers test ideas faster
- Students learn robotics cheaply
- Startups prototype automation systems
- Researchers experiment with AI robotics
In other words, they are the “learning bridge” between theory and real industrial robotics.
Cost of Building a 3D Printed Robot Arm
The cost depends on quality and complexity.
Basic Version
- $100 to $300
- Simple movements
- Educational use
Intermediate Version
- $300 to $800
- Better motors
- More joints
Advanced Version
- $800 to $2000+
- AI integration
- High precision
Best Materials for 3D Printing Robot Arms
PLA
- Easy to print
- Low cost
- Good for beginners
ABS
- Stronger
- Heat resistant
- Requires controlled environment
PETG
- Balanced strength
- Flexible
- Durable
How AI Is Changing 3D Printed Robot Arms
Modern robotics is combining AI with 3D printed systems.
Also read:What Is FN Link Technology Limited on My WiFi A Complete Guide for Beginners
AI enables:
- Object recognition
- Automated picking
- Path planning
- Voice control
This makes robot arms smarter and more useful in real-world tasks.
Future of 3D Printed Robot Arms
The future is very promising.
We will see:
- Fully AI-powered robotic arms
- Faster 3D printing materials
- Self-learning robots
- Affordable industrial automation
- Home-use robotic assistants
The gap between industrial robots and DIY robots will continue to shrink.
Common Mistakes Beginners Make
Poor Design Choice
Choosing weak or untested models.
Wrong Motor Selection
Using low-quality motors reduces performance.
Weak Assembly
Loose joints affect accuracy.
Ignoring Calibration
Proper calibration is required for precision.
Tips for Building a Better 3D Printed Robot Arm
- Use high-quality filament
- Reinforce joints with metal parts
- Start with simple designs
- Test each joint separately
- Use proper power supply
Who Should Build a 3D Printed Robot Arm
- Students
- Engineers
- Makers and hobbyists
- Teachers
- Startups in automation
Learning Path for Beginners
If you want to build a 3d print robot arm, follow this path:
- Learn basic electronics
- Understand Arduino programming
- Learn 3D modeling
- Study robotics basics
- Build small projects first
Final Thoughts
The 3d printed robot arm is one of the most exciting innovations in modern robotics. It combines creativity, engineering, and affordability into one powerful learning tool.
While it cannot replace industrial machines, it plays a major role in education, prototyping, and innovation.
As technology improves, these systems will become smarter, cheaper, and more capable. For beginners, it is one of the best ways to enter the world of robotics and automation.
FAQs About 3D Printed Robot Arm
What is a 3D printed robot arm used for?
It is used for learning robotics, prototyping, automation experiments, and small tasks like picking and placing objects.
Can a 3D printed robot arm lift heavy objects?
No. Most 3D printed arms are designed for lightweight tasks only.
How accurate is a 3D printed robotic arm?
Accuracy depends on motors and design quality. It is good for basic tasks but not industrial precision.
What software is needed to control a robot arm 3D printer system?
Common tools include Arduino IDE, Python, and sometimes ROS for advanced systems.
What is the difference between industrial and 3D printed robot arms?
Industrial arms are made of metal and highly precise, while 3D printed arms are affordable and used for learning and prototyping.